Eclipse, and most integrated development environments (IDEs), are that way. It is an extremely powerful tool in the right hands. In the hands of a novice, sometimes it can be overwhelming.
Novice Java developers are taught about the classpath in their first days or hours of learning the Java programming language. When using java.exe and javac.exe command line tools, the classpath is usually transparent or can be made transparent with a simple call to setenv. When developers step up to an IDE, what the classpath is and what it points to isn’t so clear anymore. So, if you are just learning Java and need some help on the where to set and get information on the classpath, this posting is for you!
By the way, take heart. The reason I make this post is because so many of my students have had questions about the classpath or wrestled with problems due to the classpath setting in the IDE that I felt compelled to write this post in hopes of alleviating some future student’s pain. So you are not alone.
Maybe one of the largest issues with classpath and Eclipse is that there are so many places to set and affect the classpath. So, let’s address them one at a time.
The Project Properties
First, start Eclipse and right click on a project folder in the Package Explorer view. Select Properties from the menu that results.

A Properties window like that shown below will appear.
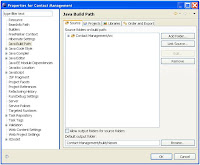
Select Java Build Path from the menu on the left hand side. A series of tabs (Source, Projects, Libraries, Order and Export) appear. It is on these tabs that you can set the “build” classpath. That is, you can set where Java will find class files, Jar files and other resources when it is compiling (building) your application. The Source tab allows you to specify folders of source code (typically folders containing the packages and .java files for your project). The Projects tab allows you to include the code from other Eclipse projects into the building. Finally, the Libraries tab allows you to specify libraries of classes to add to your build – either external or internal to Eclipse.
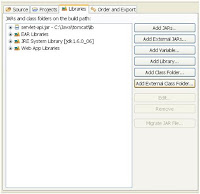
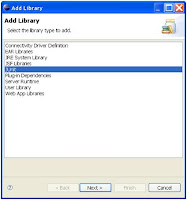
Selecting the Add JARs button on this tab allows you to add a Java library (JAR or ZIP file of classes) that is known to Eclipse (that is part of an open Eclipse project). The Add External JARs button allows you to add a Java library that is available via your computer’s file system or network (essentially any library reachable by your machine). The Add Library button allows you to add the classes (via Java library) of a Java/Eclipse plug-in, tool (like JUnit), or framework (like Struts or JSF) that is known and installed with Eclipse.
The Add Class Folder button allows you to add the classes from any folder of any project that is open in Eclipse.
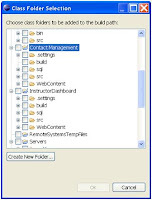
And of course the Add External Class Folder button allows you to add classes from any folder on your computer’s file system or network to your build. I skipped one button; the Add Variable button. That’s covered in the next section.
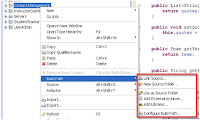
By the way, as a short cut, you can also adjust the build path by right clicking on a project in the Package Explorer view and selecting Build Path from the menu.
Variables
So what does the variable button do? If you click on it, you’ll see you can add a variable to the build path but what does that mean?
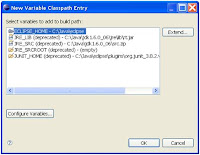
Close the project properties window and return to the Eclipse window. In Eclipse, select the Window > Preferences menu option on the menu bar.
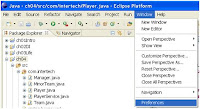
In the Preferences window that appears, locate the Java > Build Path > Classpath Variable option in the menu on the left (see the image below, it can be a little tricky to find in this large menu.

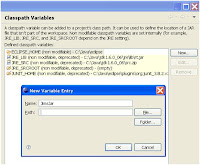
A classpath variable allows you to define a variable or alias to a folder with class files or a specific JAR file. Then, the variable can simply be added to the classpath of either the build or runtime configuration (see below). A variable helps you easily refer to a particular library without having to remember where it is. Also, it allows the location to change without having to change the project – just change the variable’s path. This can be particularly useful if the library is shared by several projects.
The Runtime Configuration
The classes that are available to build the application are not always the same as the classes available to run the application. When you are ready to run your application, most people just click on the Run As or Debug As icons in the Eclipse toolbar; unaware that Eclipse is setting up an environment complete with a classpath to execute your code. When you run or debug your application, Eclipse sets up what is called a runtime configuration. That configuration includes a classpath telling the Java VM where it should locate classes, libraries, etc. needed as the application is executed. You can modify this execution or runtime classpath as well.
Right click on one of your executable classes or projects in the Package Explorer view. Select either the Run As… or Debug As… option from the menu that appears. From the sub-menu that appears, notice the Run Configurations… or Debug Configurations… option that is presented.

Select the Run Configurations… option and a Run Configurations window like the one shown below should appear.
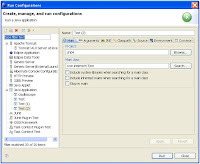
In the menu on the left hand side, find the Java Application listing. These are your runtime configurations. By default, the name of the configuration usually matches the name of your executing class. In the Main tab to the right, notice the “Main class” field. This is the class that is going to be executed when you request your project or class “Run As…” Click on the Classpath tab and you see a display similar to that below.
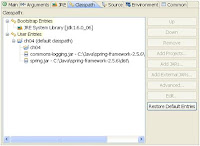
By expanding the entry trees, you can see all the file folders and libraries that are part of the runtime classpath and are accessible to your application as it is execute. Again, with the buttons on this window, you can choose to add or remove file folders and libraries (internal or external JAR or ZIP files) to the classpath. By default, the runtime classpath should contain the same file folders and libraries as your build path.
A classpath checker
For those that find they have some issues with duplicate classes or classes not found, you may want to take a look at the Classpath Checker Eclipse plug-in (available here).
This tool will detect missing JAR files and help detect if you have classes coming from more than one location (duplicate classes).
Hope this helps developers trying to untangle the mystery of classpath in Eclipse. If you need help learning Java or other open source technology, come join me in class (www.intertech.com).


Hey, thanks for writing this. For some reason Eclipse has been real confusing to me especially regarding classpaths.
ReplyDeleteOne thing I've noticed about Java is that you really get thrown in the deep end when starting. So my first Java project has already got me learning ant, maven, Hibernate, Eclipse and a little spring (I already knew the language luckily). I've also got Tomcat, JSP, jquery and God knows what else but I'll focus on that later.
So I read the book Harnessing Hibernate which mostly explained how to do things on the command line. I ended up with a Maven directory (~/.m2/) with all these JAR files for all the Hibernate dependencies. I figured I ought to start putting the project in Eclipse. At first I started adding the JAR files to Hibernate 1 by 1 which would get me one step closer to a successful run of my project with each additoin. Is there a faster way. I tried just using the "Add external class folder" button to set the class path to the Maven directory but that doesn't seem to work. The Maven directory is very hierarchically deep and has many JAR files. I just want to say to eclipse "All of my dependencies are somewhere deep in /home/me/.m2/". Is that possible. Any help would be appreciated.
Greg,
ReplyDeleteI don't have all that much experience with Maven. However, one of Intertech's finest - Jeff Jensen - has and he told me "Use the m2eclipse plugin (linked from sonatype.com). it manages the dependencies beautifully for eclipse, as defined in the POM."
Thanks for your posting and I hope this helps.
Sounds like a good tip. Thanks.
ReplyDeleteHi,
ReplyDeleteThanks for your good tutorial.
I have a related question. I keep getting the following error, when trying to activate my TestNG project:
Java.io.IOException: Cannot run program "C:\Program Files\Java\jdk1.6.0_17\bin\javaw.exe" (in directory "C:\Workspace\testSeam1-test"): CreateProcess error=87, The parameter is incorrect
From googling the error, a possible reason might be that my class path is too long.
What is the best way to shorten the Classpath, i.e. remove unnecessary elements from it?
Thanks,
Rani.